
The Tech of Knee-Deep in Tech, 2020s edition - part 2
In part 1 of this blog series I outlined the gear we use to record the podcast. This part will focus on the techniques and settings we use to recording an episode.
We share a OneNote file with ideas and information for every episode. We kind of screwed up the episode numbering early on. While we’re technically on episode 104 at the time of this writing, we have recorded several more specials and weirdly numbered episodes. This goes to show that not all ideas are good ideas in the long run and that starting a podcast isn’t easy… We generally try to aim for 30 minutes. Some of the episodes run longer, some run shorter. It always surprises me how difficult it is to judge time while recording.
Some things we’ve had to learn the hard way. Sound treatment matters – more or less depending on the type of microphone used. Proper microphone technique matters even more – especially on condenser microphones. It is easy to breathe loudly, and that means more work for me in post-production. The same goes for distance to the microphone. Changing the distance will immediately affect the loudness of the signal – again leading to more work for me in post-production. Clicking the mouse or typing at they keyboard isn’t something you notice while recording, but trust me – the microphone does.
Recording the hosts
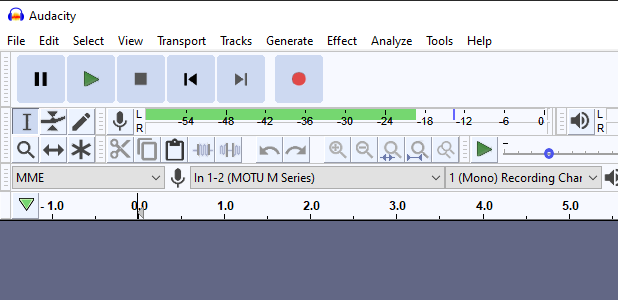
All of us record audio locally. This way we’re not dependent on the internet and should we lose communication we still have all the recorded raw audio. Toni and I use Audacity to record audio and Simon uses his Zoom H6. We all use the same 44.1 kHz sample rate for recording. A small tip about Audacity: when preparing for recording, we always save the project in Audacity first. Then we record – this seems to mitigate some of the weirder bugs in Audacity that can screw up the audio if the project wasn’t saved before recording.
We set our levels individually and aim somewhere close to -18dB. This gives me ample room to work with the audio in post-production without having to worry about peaks in the audio clipping. To set the levels in Audacity, click on the recording level on the top of the main window. Then talk normally into your microphone as you turn the gain knob on the audio interface. The goal is to find a gain setting that gives you roughly -18 dB on average on the meter.
While we record locally we also use a Microsoft Teams video chat for the audio sync. It works like this: We all wear a secondary headset (on Simon it looks extra weird as he has two headworn microphones) connected to Microsoft Teams. This way we can see each other as well as use that audio stream to sync the locally recorded streams. At the beginning of every episode I clap loudly twice, then Simon and Toni do the same. This gives me easy to spot spikes in the audio files that I can use to line all the files up to in post-production.
After the clapping bonanza it’s time for five seconds quiet. This is to give me ample data to use for noise reduction later in the post-production. Then it’s time to start the show with the usual “Hello and welcome! I’m Alexander…” and off we go.
When we’re done recording, Simon and Toni export the audio in 16 bit WAV (we might look at going up to 24 bit down the line) and put the files in my “incoming files” directory on onedrive. I save the Microsoft Teams stream to this folder as well. All these files are then collected to a raw folder and used as raw input for editing. I never change these files from the original and keep them as backup.
Recording with remote guests
If we have a remote guest things become trickier. We need to balance good audio with a minimum of hassle for the guest. The obvious choice would be Skype or Teams, but the sad truth is that the audio quality simply isn’t anywhere near what we need. The least bad solution we’ve settled on is Zencastr. This tool does all the things we do above – automatically. It creates a channel where everyone hears each other while still recording audio locally. Zencastr automatically sends all the resulting files to a dropbox account when the recording is done. In fact, Zencastr would be the PERFECT tool as it simplifies the workflow tremendously – if it wasn’t for one tiny thing. Audio drift.
In short, most of the time we use Zencastr, the files don’t line up. It would be easy if it was a linear drift, i.e if the files were a few seconds longer or shorter. That way I could just increase or decrease playback speed ever so slightly. Unfortunatly this is not the case. The drift is completely random. This means that I need to chop the episode into a gazillion tiny bits and pieces and then try to move them around to get a whole. It kind of did away with the whole point of Zencastr. I’ve spoken to their excellent support, but this “happens from time to time, especially on slow computers”. I assure you that neither of the hosts have a slow computer… Things might be better if we used the paid version and exported in WAV, I honestly don’t know.
The other alternatives we’ve found have been prohibitively expensive. They also try to do a lot of other things not only related to recording, something I’m not prepared to pay for at this time.
Someone said that the software Reaper might be a solution for this scenario. I have yet to check that out.
Despite the issues with audio drift and the fact that the free version of Zencastr only supports a total of three people, it is still the best choice for recording remote guests – from both a technical and financial standpoint. I will most likely have to do some cutting and splicing to get the audio to line up – but having to do that for one track beats having to do it for all tracks.
Recording on-site
Recording on-site is very similar to recording just the hosts. We all use the same kind of microphone (AKG C520/C520L) connected to the Zoom H6 previously mentioned. The levels are again set for -18dB. As the three of us (and the guest!) will have slightly different loudness, it is key to set the levels per channel. Rarely we find ourselves having more than one guest. The Zoom H6 is indeed a six-channel recording device, but it only has four XLR inputs. The last two channels can either be recorded on the X/Y microphone included (not a good idea) or using the 3.5mm input jack on the X/Y microphone (an excellent idea).
As this is a stereo jack, we have a choice. Either we bust out two Rode SmartLav+ lapel microphones and a 3.5mm stereo-to-mono splitter, or we use the Samson MobileMic receiver and two beltpacks+microphones. The receiver outputs a stero signal (one channel for each transmitter) and that can be used straight into the Zoom H6.
As the AKG microphones are condenser, we try to find a good recording area. We’ve found that while it might seem like a good idea to record in an empty and quiet room, the reverb will be evident on the recording.
It might actually be a better choice to record out in a hallway, despite the murmur and sound of passers-by. It’s all down to judgement at the time of recording, really. Here it is absolutely vital to leave 5-8 seconds of quiet in the beginning for noise reduction. But do be careful with the noise reduction in post-production as it might not behave as expected with a noisy background!
A tip for using a head-worn microphone with a guest not used to them: be wary of facial hair. It is easy to miss that a moustasche is constantly scratching the foam around the microphone, but the microphone will not miss it. At all.
The next post in the series is about post-processing, and I can already warn you that it’ll be long and technical. Act accordingly.